Author Archives: M~

Fiery Pizza Sauce

Posted on

So I know I’m a bit overdue here, but better late than never. Work kept me so busy I just didn’t have the time to get on and post. I apologize for the delay! Without further ado, the pizza sauce recipe! Crust will follow at a later date!


Today’s Topic: Let’s Hit the Sauce!


Store bought pizza sauce is great and all, but the connoisseurs of the pizza world don’t settle for store brand sauces. Nope, we make our own. Why? Because it’s always nicer to eat something that you’ve put a lot of effort into making, and also it makes your pizza unique to what other people dish out. It’s always good to be unique in a world where pizza is generally rather the same across the board, depending on the style (we prefer Chicago style). Pizza sauce is even better when it isn’t that sweet stuff, and has a bit of a kick. That’s where we bring in our recipe.


What you’ll need:

  • Spoon
  • Sauce Pan
  • Immersion Blender (not necessary but it helps)
  • Can Opener
  • Measuring Spoons


Ingredients:

  • 1 tablespoon of Penut Oil
  • 1 tablespoon of Minced Garlic
  • 1 teaspoon of dried oregano
  • 1 teaspoon of GV sugar substitute (you can use real sugar if you want, we were cutting calories)
  • 1/4 teaspoon of Cayenne
  • 1/2 teaspoon of Salt
  • 1/2 teaspoon of onion powder
  • 1 pinch of Black Pepper
  • 2 14.5oz cans of Diced Tomatoes (do not drain)


Recipe:

Step 1:

Warm the oil in a medium sauce pan on low heat.


Step 2:

Add the garlic and stir continuously for one minute.


Step 3:

Turn heat to medium or medium low (depending on how hot your medium is) and add the rest of the ingredients, starting with the tomatoes.


Step 4:

Simmer for 90 minutes, stirring often.


Step 5:

Optional: For smoother sauce, use immersion blender to puree the sauce near the end of the 90 minutes. If you don’t do this, you get a chunkier, but just as delicious sauce.


Step 6:

Apply to your favorite pizza crust (like we did in the below picture), cook, and enjoy!


20140309_174557[1]

Computer Failure

Posted on

I apologize for the lack of posting the past few weeks. My computer died and I was unable to get on to make a post. Now that I’m back up and running, I’ll be trying to get back into posting this weekend. I have several recipe’s that I’ve been working on, so I have plenty to post!

Cheesy White Mac

Posted on

It was a long week, but we got some things done. Work was as it always is: work. Good times, though. There’s a lot going on in the architecture field and it keeps me busy doing what I love so I can’t complain. Of course, when I come home, I want something good to eat. Something that’s quick is really good too.

Today’s Topic: Hey, Mac. Where’s the Cheese?

Mac n’ Cheese is an easy dish. It’s so easy that it’s sold in a box at the grocery store. But anyone can make it and make it better than what they get out of the box. They key here is in the fact that it’s quick, delicious, and different from the run of mill. Fair warning, it’s got a bit of a bite. This isn’t that Kraft nonsense!

What you’ll need:

  • Medium Saucepan
  • Wooden Spoon
  • Measuring Cup
  • Knife

The Recipe:

  • 2 servings Ziti
  • ½ cup 2% milk
  • 2.5oz Cacique Queso Fresco
  • 1 oz Brie cheese
  • 1 oz 2% Milk Velveeta
  • 1 ½ tbsp Italian Breadcrumbs
  • 1 pinch of salt
  • 1 pinch of cayenne

Step 1:

Fill a pot with the amount of water called for on the ziti box. This recipe is for two servings, but you can always double up and do more. Just make sure to use the right amount of water and a big enough pan. Put the pan on and bring it to a boil.

Step 2:

Add the pasta to the boiling water and boil for the time it says on the box. I always go with the lowest number for time. The pasta has a nice texture then. Add a bit of salt to the boiling pasta.

Step 3:

Drain the pasta, and put it back on the heat, but turn the heat down to medium-low.

Step 3:

Add the milk and then the cheese. Stir often until cheese is melted.

Step 4:

Add the breadcrumbs and cayenne. The deliciousness will be nice and thick, adhering to the noodles with not much extra sauce.

Step 5:

Plate and serve!

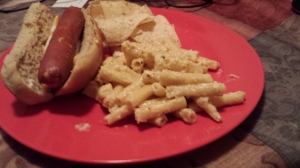
20140306_183242

As you can see by the picture, I enjoyed mine with a turkey sausage and some corn chips. It was delicious and quick. Only took me about twenty minutes to make the whole meal, which is great when you come home and only have a couple of hours before you need to go to bed! We hope you enjoy this recipe. Feel free to share it with your friends and let us know what you think of it.

Coming soon:

  • Pizza Sauce Recipe
  • Pizza Crust Recipe
  • Homemade Pizza Recipe
  • Pumpkin Cake Recipe
  • A review of the Veggie and Cheese Pizzas from Barnaby’s in South Bend

Red-Green Chili

Posted on

As promised yesterday when we started this blog, today earns the first post of a recipe. Please take into account the fact that my counterpart in Illinois has all the good dishes. Yes, that means you get to see good food in a crappy dish, but that will change eventually. Besides, it’s not the dish that you eat, it’s the food in it!

Today’s topic: Brrrr! It’s Chili!

It’s cold up here in northern Indiana. What can you expect when you live due east of the Windy City, and right near Lake Michigan? It’s alright, though, because this recipe really warmed me right up.

Here’s what you’ll need:

  • 1 Crockpot
  • 1 Skillet
  • 1 Spatula
  • 1 Wooden Spoon
  • 1 Soup Ladle
  • 1 Knife
  • 1 Cutting board
  • 1 Small Mixing Bowl
  • 1 Measuring Cup
  • 1 Set of Measuring Spoons

The Recipe:

  • 1 16oz Jennie-O Ground Turkey roll
  • 2 cups of Turkey Broth
  • 14oz canned Salsa Verde
  • 20oz canned chopped Green Chilis
  • 2 chopped small Yellow Onions
  • 1 chopped Green Bell Pepper
  • 1 dash of El Yucateco Chili Habanero sauce (it’s green)
  • 1 package of Cacique Queso Blanco
  • 1tbsp minced Garlic
  • 2.5tbsp Chicken Boullion
  • 1tsp Celery Salt
  • 2tbsp Flour
  • 2tsp dried Oregano
  • 1tbsp Cumin
  • 1tbsp freeze-dried Chives
  • 3.5tbsp of Mexene Chili Powder
  • 1tsp Dill Weed
  • 1tsp Cayenne
  • Salt

Step 1:

Combine all of the spices and the flour in a small mixing bowl. Blend thoroughly. Only the boullion and chives should stand out from the rest.

Step 2:

In a skillet, brown the ground turkey. Make sure it’s done, but only lightly brown. Don’t overdo it! Chop the onions and green pepper while the turkey cooks.

Step 3:

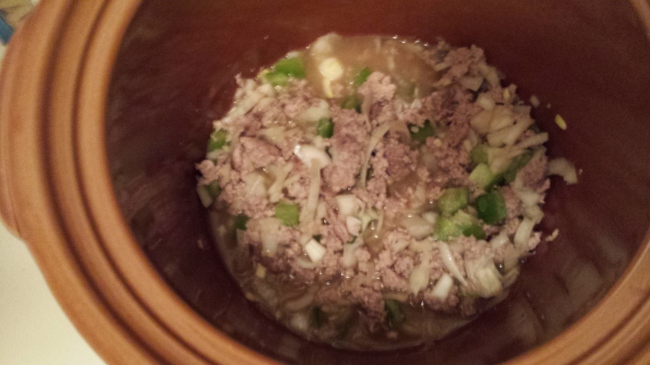
Measure out the broth and pour it into the crock. Turn the crock on low. Add the onions and bell pepper. Add the turkey. Cook on low for 30 minutes and then high for 30 minutes, stirring often. (Cooking on medium for 1 hour works too.)

Image

Step 4:

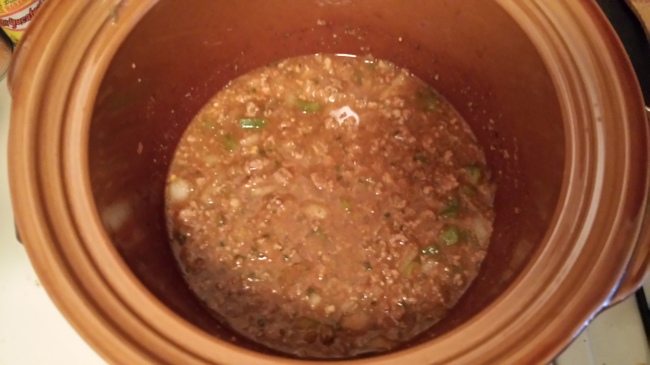
Add the spice mix and the salsa verde to the crock. Stir often. Cook for 30 minutes on low, and 30 minutes on high (or 1 hour on medium).

Image

Step 5:

Add the canned chili’s, the hot sauce, and a pinch of salt (the celery salt works wonders so you don’t need much). Stir often. Cook for 30 minutes on low, and 30 minutes on high (or 1 hour on medium).

Step 6:

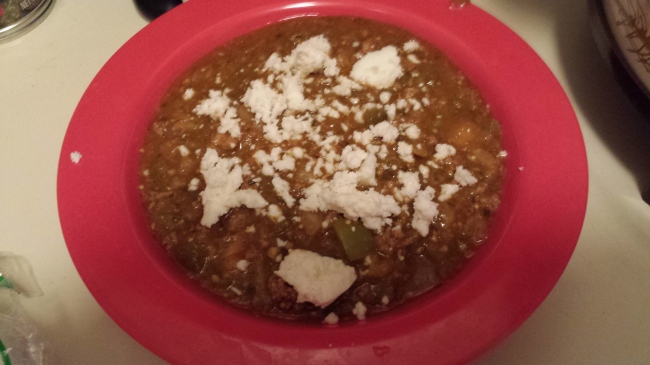
Serve immediately. Top with sprinkled queso fresco and enjoy!

Image

We hope you enjoy this bowl of deliciousness. Feel free to comment if you did or didn’t. We’re always open to suggestions for how to make our recipes better! Don’t forget to share this with your friends!

M~

Welcome!

Posted on

If you’re reading this: Congratulations! You’ve made it to yet another food blog!

You’re probably wondering why you’re here, and whether you’ll find anything useful here. Well, yes, you probably will. This blog isn’t just about recipes, but food in general! We, hereby known as M~, are just a couple who happen to love food. We decided to take our love of food to the web so that others could share in our love!

That said, either today or tomorrow the first food post shall be up with a recipe for chili! It’s cold out, so chili is a good bet to warm you up! We hope you’ll tune in to see it!